
Shoopy location inventory lets every store location keep its own on-hand count for each SKU. So, a warehouse can show 200 units of a product while the flagship store shows 12 and the kiosk shows 0 — all for the same SKU. Furthermore, the Products list, the Orders page, and the Dashboard all respond to the active location so your team only sees what is relevant to them.
For adjusting stock at one location at a time, see Update Shoopy stock quantity. For bulk adjustments, see Bulk-update Shoopy stock via CSV.
Before you begin #
- First, sign in at
web.shoopy.in. For details, see Logging in with OTP. - Also, adding store locations requires the Owner or Admin role with the Manage Locations permission. So, if you only need to view per-location stock, any role works.
- However, Location Admins see only the locations assigned to them — so they cannot switch to a location they do not own. Therefore, the steps below that reference “switching location” apply to Owners, Admins, and Catalog Managers.
- Finally, adding more than one store location may require a paid plan. So, check your subscription if the Add Store Location button is not visible in Settings.
How per-location stock works in Shoopy #
Every SKU stores a separate quantity value for each active location. The key concepts are:
- Primary location — the first and default location for a store. When a product is added, its initial stock goes to the primary location.
- Additional locations — each one gets its own counter per SKU. Stock is not automatically shared between locations.
- No automatic split — adding a new location does not redistribute stock from the primary. The new location starts at zero for all existing SKUs. Therefore, you must Stock In at the new location to initialise its inventory.
- No transfer tool — Shoopy does not have a built-in stock transfer. So, moving units from one location to another requires two manual steps: Stock Out at the source, then Stock In at the destination.
Viewing Shoopy location inventory on the Products list #
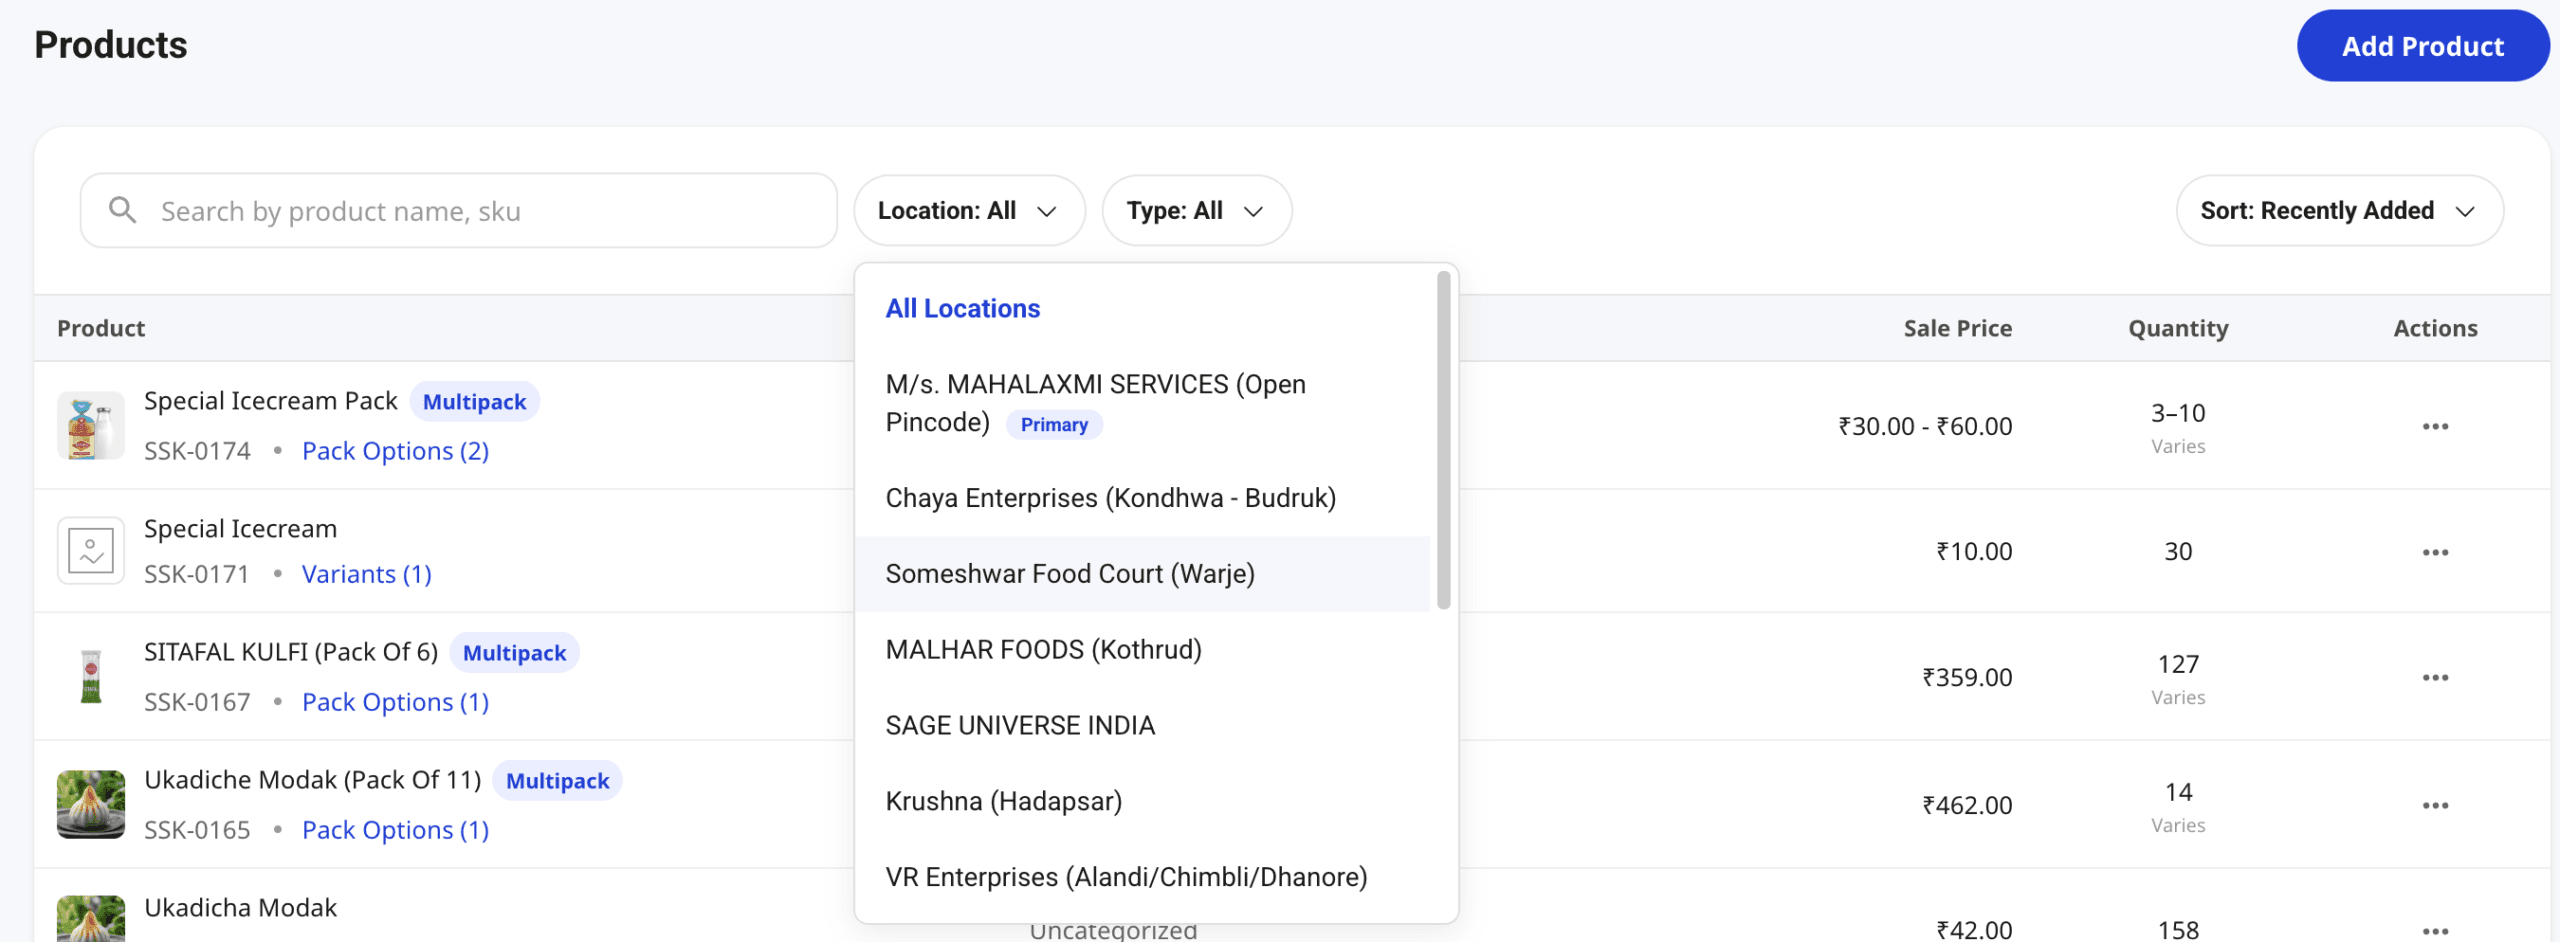
The Location filter pill on the Products list controls which location’s stock appears in the Quantity column.
- In the left sidebar, click Catalog, then click Products.
- At the top of the Products list, click the Location filter pill (defaults to All).
- Select a specific location. So, the Products list reloads with the Quantity column showing that location’s on-hand count only.
- To return to aggregate view, set the filter back to All.
When set to All, the Quantity column shows the stock for the primary location (or a combined value). Therefore, setting it to a specific location is the clearest way to see exactly what is on hand at a single site.
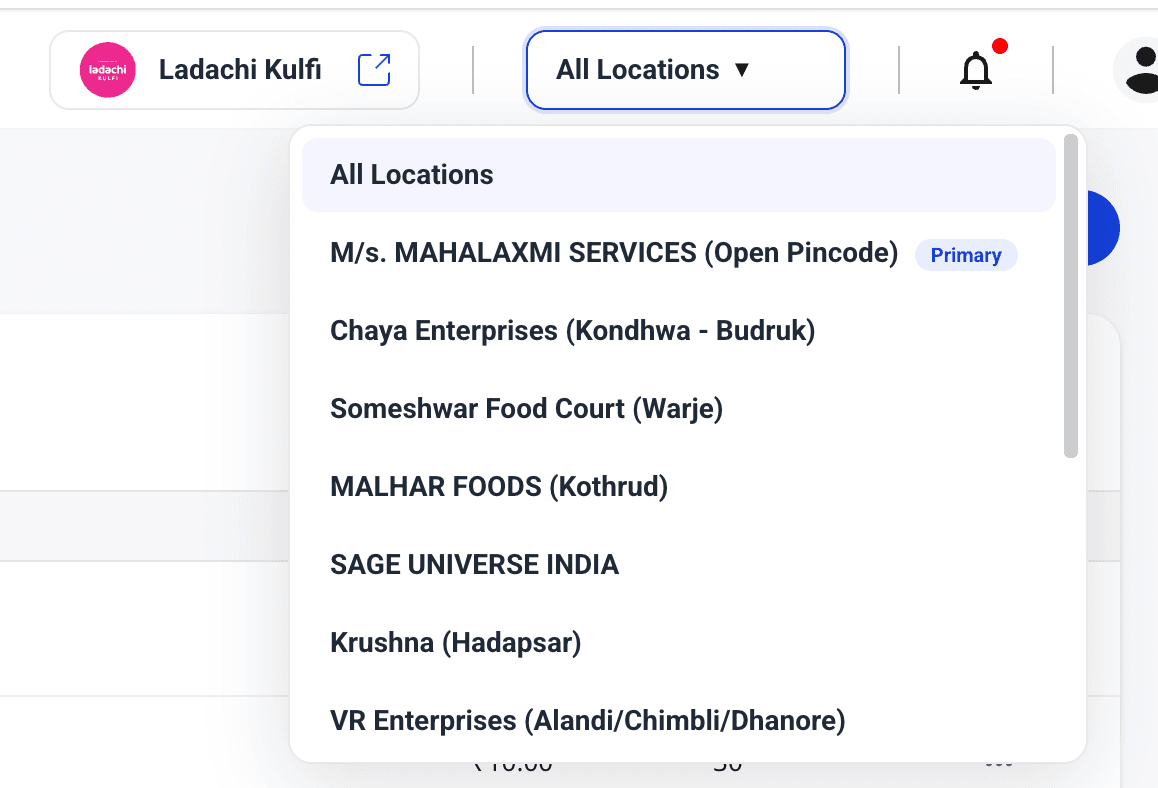
The top-bar Location switcher #
The Location switcher in the header works across more than just the Products list. So, changing it affects the Orders view and the Dashboard as well — the entire admin adapts to the selected location.
- Click the location name in the top-right header area to open the switcher dropdown.
- Pick a location to scope the session to that site. Furthermore, the selection is saved locally, so it persists when you refresh or return to the page.
- To see everything unfiltered, select All Locations from the dropdown.
Location Admins see only the locations assigned to them in this dropdown. As a result, they cannot accidentally view or modify stock at a site they do not manage.
Adjusting stock at a specific location #
Use the per-row Stock In or Stock Out modal to add or remove units at any location. The modal has a Location dropdown that controls which counter changes.
- On the Products list, hover a product row and click the three-dot Actions menu.
- Click Stock In or Stock Out.
- In the modal, open the Location dropdown and pick the target location. So, the Available Stock figure updates to that location’s current on-hand count.
- Enter the quantity and confirm. As a result, only the chosen location’s counter changes — all other locations are untouched.
For the full modal walkthrough, see Update Shoopy stock quantity.
Adding a store location in Shoopy #
Store locations are managed in Settings.
- In the left sidebar, click Settings (or the gear icon).
- Navigate to Store Locations. So, you see a list of existing locations with their active / inactive status.
- Click Add Store Location and fill in the location name, address, and contact details.
- Save. The new location becomes available in the Location switcher and in the Stock modal dropdown.
After adding a location, every existing SKU starts at zero stock there. Therefore, run a Stock In for each SKU that should be available at the new site before making it visible to customers.

Moving stock between locations (manual transfer) #
Shoopy does not have a dedicated transfer feature. However, you can achieve the same result with two Stock actions:
- Stock Out the quantity you want to move at the source location — open the Stock modal, pick the source, enter the units, and click Stock Out.
- Stock In the same quantity at the destination location — open the modal again, pick the destination, enter the units, and click Stock In.
Therefore, the net effect is a transfer: units leave one counter and enter another. Furthermore, if the two steps cannot happen at the same time (for example, a physical van is in transit), you can do the Stock Out today and the Stock In when the goods arrive.
Location Admins and inventory permissions #
Location Admins are staff members scoped to one or more specific locations. Their inventory access is intentionally limited:
- They can Stock In and Stock Out at their assigned locations — per-row modal is fully available.
- They cannot see or adjust stock at other locations — the Location switcher and the Stock modal dropdown both hide locations they are not assigned to.
- They cannot use Bulk Update — that tool is hidden for Location Admins entirely.
- They cannot add or remove store locations — that requires Owner or Admin with Manage Locations permission.
So, assigning someone as a Location Admin is the right pattern for a store manager who runs a single site and should not have visibility into other sites.
Tips for Shoopy location inventory #
- Initialise every location before going live. When you add a location, all SKUs start at zero. So, run a bulk CSV update or a round of Stock In actions to set opening counts before the location goes live.
- Use the Location filter to audit one site at a time. Set the Products list to a specific location before doing a stocktake. As a result, the Quantity column shows exactly what that site should have, and you can spot discrepancies row by row.
- Document manual transfers. Since Shoopy has no built-in transfer log, keep a running ops sheet: date, SKU, quantity, from-location, to-location. Therefore, your stock history remains traceable even without a transfer feature.
- Assign Location Admins per site. For multi-site teams, use the Location Admin role rather than giving full Admin access to site managers. So, each manager sees and manages only their site.
Troubleshooting Shoopy location inventory #
The Location filter or switcher is not visible #
Your store may have only one active location. So, the filter and switcher only appear when multiple locations exist. If you have multiple locations set up and still do not see the filter, check that all locations are marked Active in Settings → Store Locations.
A SKU shows 0 stock at a new location #
New locations start with zero stock for all SKUs. Therefore, use Stock In (per-row modal) or a bulk CSV update to set the opening count for each SKU at the new location.
Stock Out at one location reduced stock at another #
Each location has its own counter. So, Stock Out at location A cannot affect location B. If you see unexpected changes, check whether another staff member ran a Stock Out at the same time, or whether an order was fulfilled from a location you did not intend.
I want to move 50 units from the warehouse to the store — is there a faster way? #
Not currently — Shoopy does not have a bulk transfer tool. Therefore, the current path is Stock Out 50 at the warehouse and Stock In 50 at the store, using the per-row modal for each. For large-volume transfers across many SKUs, you can export a CSV, calculate the new quantities per location, and use Bulk Update — keeping in mind that Bulk Update writes to the primary location only.
Location Admins can see all locations #
Check the user’s role and location assignments in Settings → Staff. A Location Admin should have one or more specific locations assigned. Furthermore, if the role is set to Admin rather than Location Admin, they will see all locations by default.
Related articles #
- Update Shoopy stock quantity
- Bulk-update Shoopy stock via CSV
- Adding a product in Shoopy
- Logging in with OTP
- Glossary of Shoopy terms
Category: Inventory & Barcodes · Author: Shoopy Team · Last reviewed: 2026-05-06