
To clone a Shoopy product is to spin up a new product pre-filled with the values of an existing one — name, prices, images, categories, SEO, and field values — so you can change a few details and save it as a fresh listing. In short, it is the fastest way to add a near-identical product without retyping. Also, cloning is the right answer when two products share most details but differ on one or two — colour, flavour, brand variant — and you do not want to model them as variants of a single SKU.
For the long-form add flow, see Adding a product in Shoopy. For grouped variants of one parent product, see Shoopy product variants.
Before you begin #
- First, sign in at
web.shoopy.in. For details, see Logging in with OTP. - Also, your role must allow catalog edits. So, Owner, Admin, and Catalog Manager can clone a Shoopy product.
- However, Location Admins do not see the Clone menu item. Therefore, ask your Owner or Admin if you need a clone made on a location-scoped account.
- Finally, every plan — including Free — supports cloning. So, no upgrade is needed to clone a Shoopy product.
When to clone a Shoopy product (and when not to) #
Clone is the right tool when two products are mostly identical but not the same SKU.
- Clone when you want to keep them as separate products on the storefront — for example, Vanilla Cake 1 KG and Strawberry Cake 1 KG sold as standalone listings, or two near-identical SKUs from different vendors with different prices.
- Use variants when one product comes in multiple flavours, sizes, or colours under a single name — for example, a single Cake product with Vanilla / Strawberry / Chocolate as variant options. See Shoopy product variants.
- Use bulk upload when you have ten or more new SKUs to add at once. So, the CSV path is faster than cloning ten times — see Bulk product upload via CSV.
How to clone a Shoopy product #
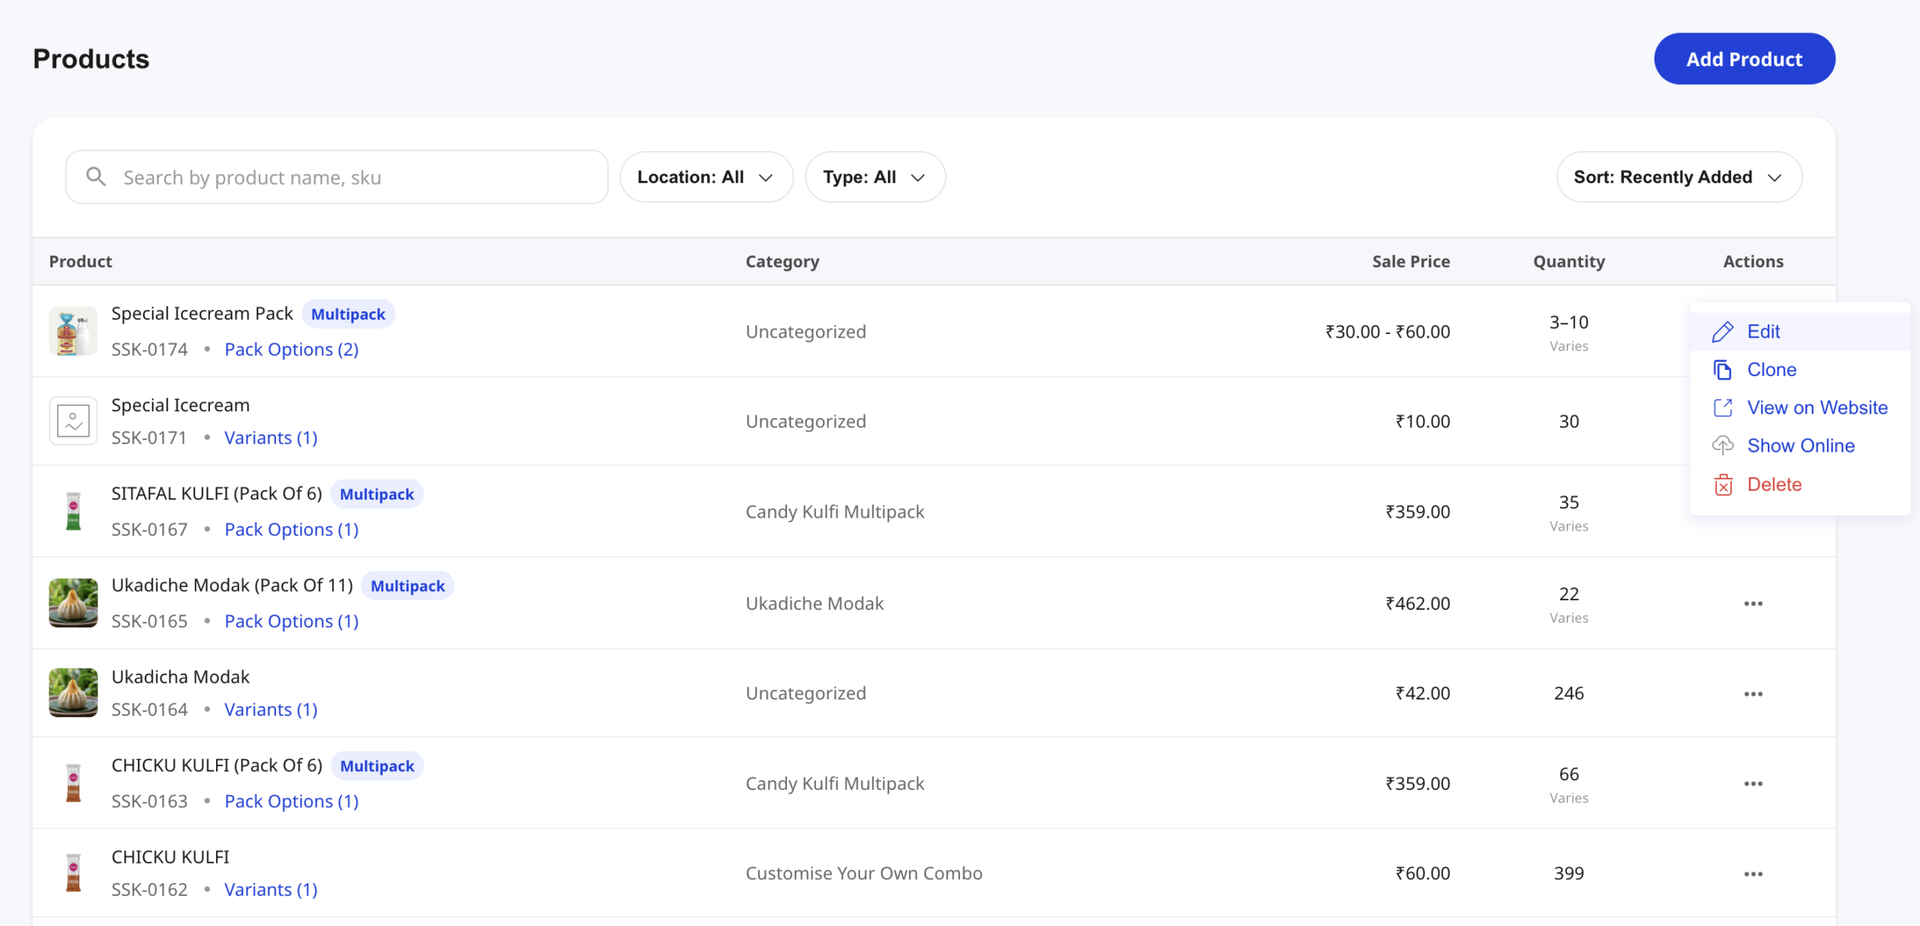
The clone action lives in the per-row action menu on the Products list.
- In the left sidebar, click Catalog to expand it, then click Products.
- Find the product you want to duplicate. Hover or click the row to reveal the three-dot Actions menu on the right.
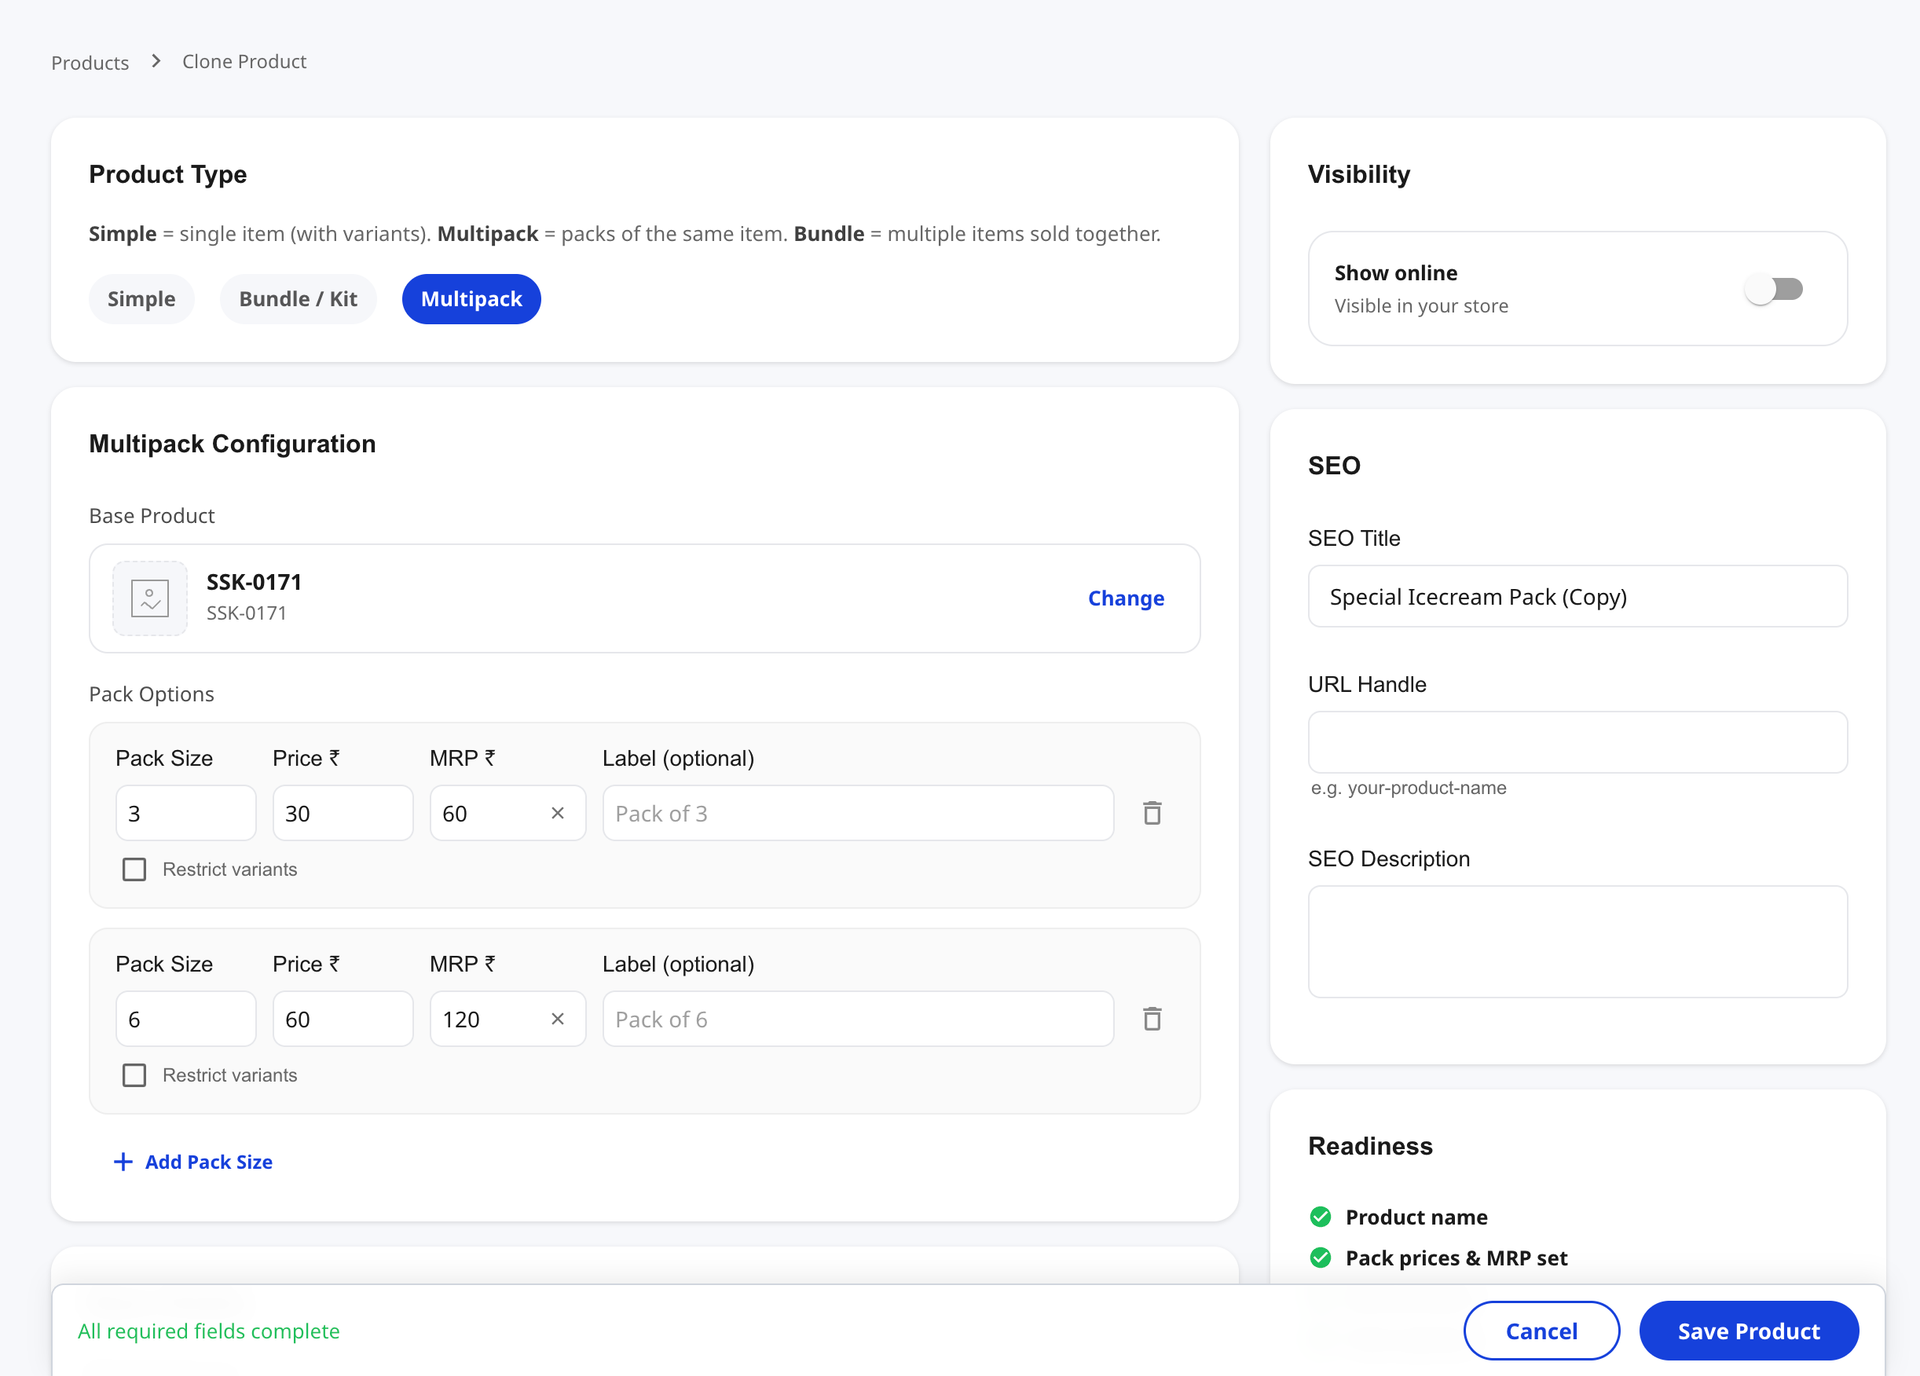
- Click Clone. The product form opens with the breadcrumb Products › Clone Product and every field pre-filled from the original.
- Edit the fields that should differ on the new product (covered below).
- Click Save Product. So, the cloned product is added to your catalog as a brand-new listing.
What carries over when you clone a Shoopy product #
Almost every field copies from the original. The clone inherits:
- Name, Description, and Summary.
- Sale Price, MRP, Purchase Price, and Tax Group.
- All images uploaded on the original.
- Categories the original belongs to.
- Variant and Attribute field values (Material, Cup Size, etc.) — see Shoopy product fields.
- Brand, Barcode, HSN, Shipping Weight, and Dimension — wherever those built-in fields are switched on.
- Stock quantity as-is. Therefore, if the original had 50 units in stock, the clone starts with 50 too — open the inventory and reset it before going live.
- Pack options if the original was a Multipack, and bundle items if it was a Bundle / Kit.
What does not carry over #
A few fields are intentionally cleared so the clone does not collide with the original.
- SKU — Shoopy generates a fresh SKU on save. So, you do not need to type one.
- URL Handle (slug) — left blank. Therefore, when you save, Shoopy auto-generates a slug from the new name (or you can type a custom one — see Product SEO in Shoopy).
- SEO Title — pre-filled with the original SEO Title plus a
(Copy)suffix, e.g. “Special Icecream Pack (Copy)”. So, edit it to match the new product before saving. - Show online (visibility) — defaults to off on a clone. As a result, the duplicate stays hidden from the storefront until you finish editing and switch it on. This safety net prevents shoppers from seeing two near-identical listings while you work.
Editing the clone — what to update before saving #
Before you click Save Product, change at least these four fields:
- Name — make it distinct so shoppers and your team can tell the two apart. So, replace the original name with the new product’s name. Otherwise the storefront listing shows two rows that look identical.
- SEO Title — drop the
(Copy)suffix and rewrite it for Google. Therefore, the new product gets its own SERP listing, not a near-duplicate of the original. - URL Handle — type a clean lowercase-hyphen slug, or let Shoopy auto-generate one from the new name. So, the storefront URL is unique.
- Stock quantity — reset to the actual on-hand count for the new product. Furthermore, leaving the inherited stock can lead to overselling on the new SKU.
Other fields to consider depending on the product:
– Sale Price and MRP if the new product is priced differently.
– Images — replace or add new product photos.
– Categories — adjust if the clone belongs in a different bucket.
– Variant / Attribute values — update Material, Brand, or any other attribute that changed.
When the Readiness checklist on the right of the form shows every required item ticked, the bottom bar reads “All required fields complete” and the Save Product button activates. Click it. Therefore, the clone is created and you land on the Products list with the new entry visible.
Tips for cloning Shoopy products #
- Rename first, edit later. Change the Name before touching anything else. So, you avoid saving a duplicate by accident if you get pulled away mid-edit.
- Leave Show online off until you finish editing. Shoopy defaults the toggle off for a reason. Therefore, only switch it on once the new product is ready for shoppers.
- Reset stock right after rename. Inventory carryover is the most common gotcha. As a result, set the correct on-hand quantity early.
- Clone a “template” product. Maintain one off-storefront product with your standard description format, image style, and field values switched on. Furthermore, cloning that template gives every new listing a consistent shape.
- For ten or more new products, switch to CSV. Cloning is fastest for one or two duplicates. So, when the count climbs, see Bulk product upload via CSV.
Troubleshooting cloning a Shoopy product #
I cannot see the Clone option in the row menu #
The Clone menu item is hidden for Location Admins. So, ask the store Owner or an Admin to clone it for you. Other roles — Owner, Admin, Catalog Manager — see the option on every row.
The cloned product appeared on the storefront with the original’s name #
You saved the clone before editing the Name and Show online stayed on accidentally. So, open the duplicate, change the Name, save, and turn Show online on once it is ready. The original storefront URL is unaffected.
Stock is wrong on my new product #
Stock quantity carries over from the original. Therefore, edit the clone, set the correct quantity, and save.
Variants of the original did not get duplicated #
Cloning copies a single product, not the variant tree. Therefore, the clone is a new base product with the same variant fields but no child SKUs. To create a variant, open the new product after saving and add variants from the variants section — see Shoopy product variants.
The new SKU is auto-generated — can I set my own? #
Shoopy assigns a fresh SKU when you save the clone. So, if you need a custom SKU, save first, then edit the new product and set the SKU under Product ID or your internal numbering scheme.
I want to clone several products at once #
Bulk clone is not available — clone runs one product at a time. Therefore, for ten or more near-identical products, export the original via CSV, edit the rows in a spreadsheet, and re-import using Bulk product upload via CSV.
Related articles #
- Adding a product in Shoopy
- Shoopy product variants
- Bulk product upload via CSV
- Shoopy product fields
- Product SEO in Shoopy
- Glossary of Shoopy terms
Category: Products & Catalog · Author: Shoopy Team · Last reviewed: 2026-04-27