
Shoopy bulk product upload lets you add many products at once instead of typing them in one by one. In short, you download a ready-made template, fill in your rows, save as CSV, and upload it back. Also, Shoopy validates the file, imports in the background, and tells you when it’s done.
For single-product entry, see Adding a product in Shoopy. For sets and packs (which bulk upload does not create), see Shoopy product bundles and multipacks.
Before you begin #
- First, sign in at
web.shoopy.in. For details, see Logging in with OTP. - Also, your plan must be Basic or higher. In short, bulk import is blocked on the Free plan.
- However, Location Admins cannot bulk upload. So, ask an Owner, Admin, Catalog Manager, Marketing Manager, or Billing Manager.
- Finally, create your Categories first. Categories must already exist — the importer will not create them on the fly.
What Shoopy bulk product upload can and can’t do #
| Can do | Can’t do |
|---|---|
| Create many Simple products at once | Create Bundles or Multipacks |
| Create product variants (Size, Color, Weight) via multiple rows | Create Categories that don’t already exist |
| Attach images via public URLs (comma-separated) | Upload local image files inside the CSV |
| Update existing products (on higher plans) | Replace variant images separately from the parent |
So, think of bulk upload as the fastest path to fill a new catalog with simple products — not as a full replacement for the product editor.
Where Shoopy bulk product upload lives #
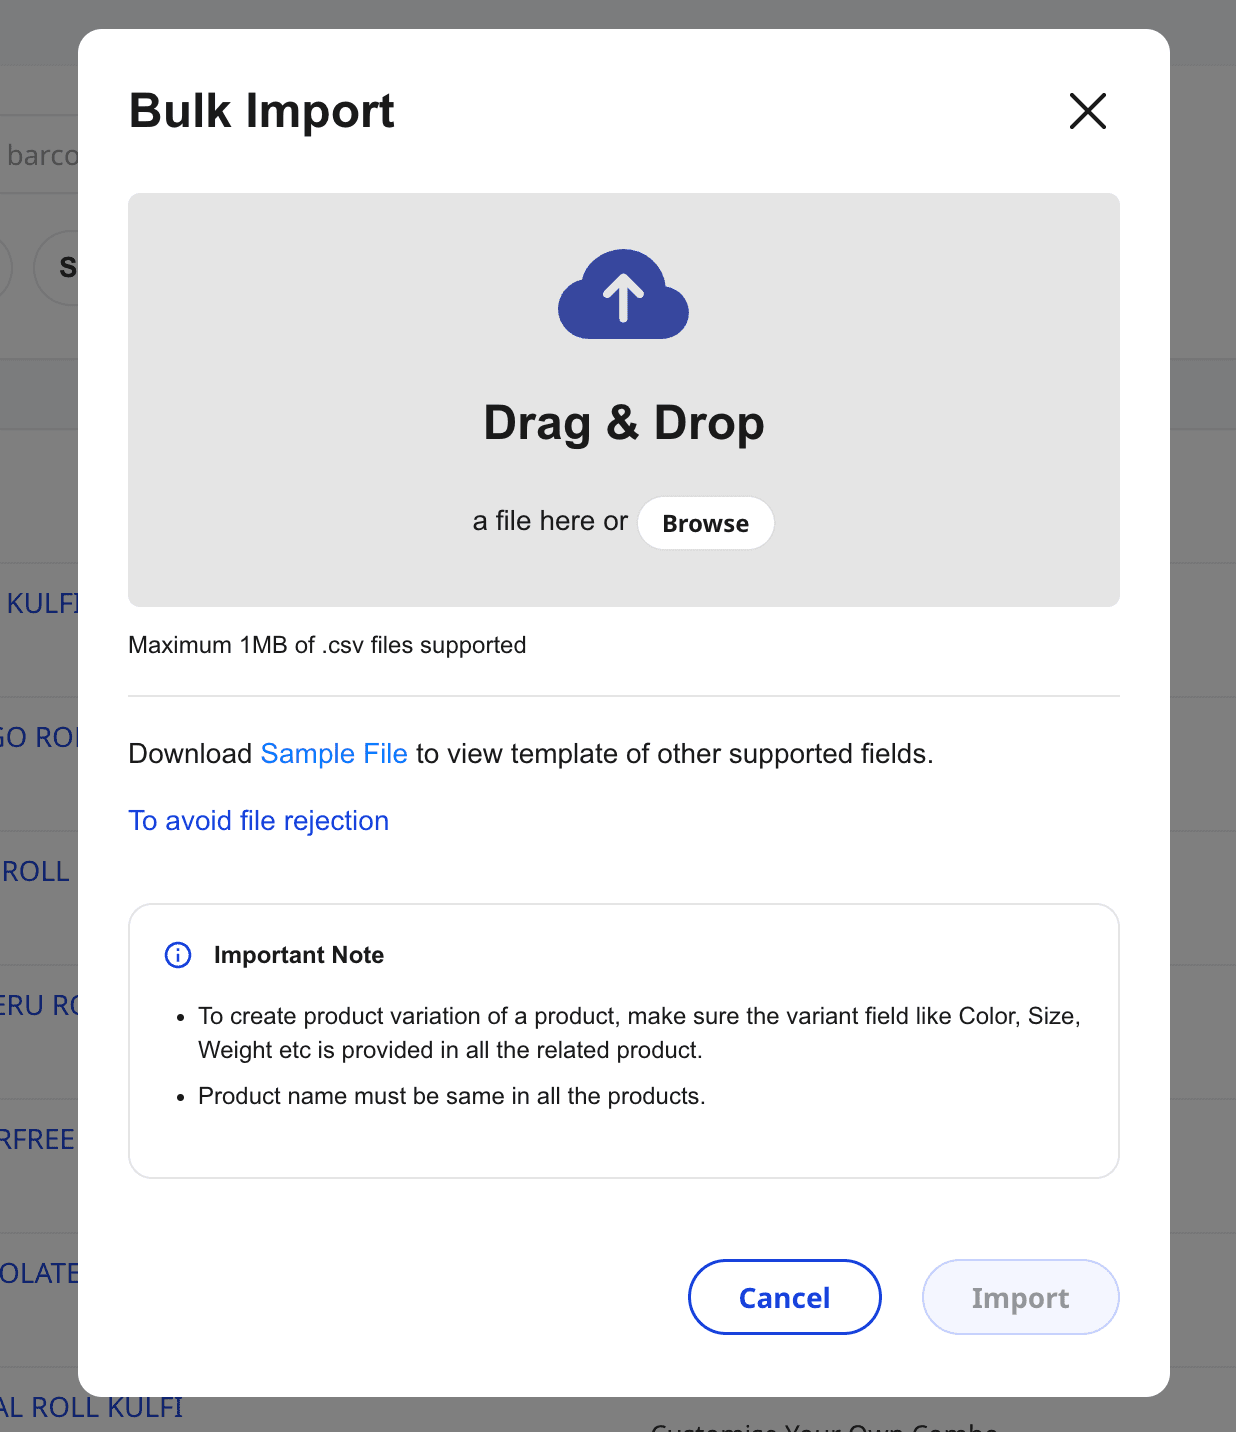
The button sits on the Products list:
- Open Catalog → Products.
- Click the Add Product button’s dropdown arrow.
- Pick Bulk Import.
In short, the Bulk Import modal opens over the Products list. Also, if you’re on the Free plan, Shoopy shows an upgrade prompt instead of the modal.
How to run a Shoopy bulk product upload #
The flow has three parts — download, fill, upload.
1. Download the sample template #
Inside the Bulk Import modal, click Sample File. In short, this downloads an Excel spreadsheet pre-labelled with the columns Shoopy expects. Always use the latest sample — don’t reuse an old one you saved months ago.
2. Fill in your rows in Excel #
Open the file in Excel, Numbers, or Google Sheets. Then, add one row per product you want to create.
| Column | Notes |
|---|---|
| Name | Product name. Required. |
| SKU | A unique code per row. Required for updates; recommended for creates. |
| Sale Price | The selling price. Required. |
| MRP | Optional. Shoopy enforces MRP ≥ Sale Price. |
| Category | Must match a category you’ve already created. |
| Images | Paste one or more public image URLs, comma-separated. |
| Color / Size / Weight | Use these for variants. One row per variant combination. |
In short, leave optional columns blank — don’t delete them.
3. Save as CSV and upload #
Important — Shoopy’s uploader accepts .csv only. So, use File → Save As → CSV in your spreadsheet app before uploading.
- Back in the Bulk Import modal, drop your CSV into the upload box (or click to choose).
- Shoopy verifies the file header and row data.
- If all rows pass, click Import. Otherwise, download the error file, fix the rows, and try again.
- Shoopy processes the import in the background and shows an “Import Successful” message.
- Refresh Catalog → Products after a minute to see your new rows.
So, the whole loop is: download template → fill → save CSV → upload → import.
Required fields in the Shoopy bulk product upload #
Shoopy rejects the file at the header stage if a required column is missing. Also, row-level checks kick in once the header is valid.
- Header errors — Shoopy lists the missing field names. For example,
Missing field(s): sku, category. - Row errors — Shoopy counts bad rows and offers a Download button. Then, that download is
ProductErrors.csvwith one row per problem.
In short, fix rows inside ProductErrors.csv, merge back into your upload file, and re-import.
Creating variants via Shoopy bulk product upload #
Variants ship as multiple rows with the same product name but different variant fields.
For example, one product “Cotton T-Shirt” with three sizes becomes three rows:
| Name | Size | Color | Sale Price | SKU |
|---|---|---|---|---|
| Cotton T-Shirt | S | Red | 499 | TSHIRT-S-RED |
| Cotton T-Shirt | M | Red | 499 | TSHIRT-M-RED |
| Cotton T-Shirt | L | Red | 499 | TSHIRT-L-RED |
In short, matching names group the rows. Then, Shoopy creates one product with three variants.
Note: Variant fields in the template are Size, Color, and Weight. For other axes (like Flavor), create a custom Additional Field first.
For more on variants, see Shoopy product variants.
File limits #
- File type:
.csvonly. Save the XLSX template as CSV before upload. - File size: Up to 5 MB per file. So, split very large catalogs across two or three runs.
- Upload runs in the background. The modal says “We are uploading your products, process will take some time.”
Therefore, don’t re-upload the same file while the previous run is still processing.
Updating products in bulk #
Bulk update (matching rows to existing products by SKU) is a separate Professional-plan feature. In short, the standard Bulk Import only creates new products.
For updates, you’ll see a Bulk Update option next to Bulk Import once your plan qualifies. Then, the flow is similar — upload a CSV and Shoopy matches rows to existing SKUs.
Tips for Shoopy bulk product upload #
- Start with ten rows. In short, test with a small file before uploading hundreds.
- Use consistent category names. So, typos like “Bakery ” (with a trailing space) will fail the row.
- Keep image URLs public. Shoopy fetches them during import. So, private Drive or WhatsApp links won’t work.
- Don’t rename columns. In short, Shoopy matches headers by name.
- Keep SKUs unique. Then, later updates stay simple.
- Re-save from Excel as CSV-UTF-8. Also, this keeps Indian characters like ₹ and । intact.
Troubleshooting #
Shoopy says “Missing field(s): …” #
First, open the CSV in a text editor and check the first line. In short, all required column headers must be present and spelled the same as in the sample file. Therefore, re-download the sample, paste your data into it, and re-save.
Row errors keep coming back #
Download ProductErrors.csv from the modal. Also, each error row includes a reason. Finally, most errors are missing required fields, a category that doesn’t exist, or non-numeric Sale Price.
I don’t see “Bulk Import” in the Add Product menu #
First, confirm your plan is Basic or higher. Also, Location Admins don’t see the option — ask an Owner or Admin to run the import.
Upload fails with “Max file size exceeded” #
The file is over 5 MB. Therefore, split it into two or three smaller files and upload each in turn.
My uploaded products don’t show up #
Shoopy processes in the background. So, wait a minute and refresh Catalog → Products. If they still aren’t there, open Bulk Import again — the latest job status sits at the top of the modal.
My variants came in as separate products #
In short, the rows had slightly different names (e.g., “Cotton Tshirt” vs “Cotton T-Shirt”). Also, the matcher is exact. Therefore, normalize names to one spelling and re-import as updates, or delete and re-import as fresh.
Related articles #
- Adding a product in Shoopy
- Shoopy product variants
- Shoopy product bundles and multipacks
- Pricing, MRP, tax, and HSN in Shoopy
- Product images and video in Shoopy
- Glossary of Shoopy terms
Category: Products & Catalog · Author: Shoopy Team · Last reviewed: 2026-04-23